Vue 脚手架工具 Vue-Cli
vue-cli 是由 Vue 提供的一个官方 cli,专门为单页面应用快速搭建繁杂的脚手架。它是用于自动生成 vue.js+webpack 的项目模板。
官网:https://cli.vuejs.org/zh/
1.安装Node.js
vue-cli 需要 Node.js 8.9 或更高版本 (推荐 8.11.0+)。
下载地址:https://nodejs.org/en/download/,我们一般安装LTS(长线支持版本 Long-Time Support)
Node.js是一个新的后端(后台)语言,它的语法和JavaScript类似,所以可以说它是属于前端的后端语言,后端语言和前端语言的区别:
- 运行环境:后端语言一般运行在服务器端,前端语言运行在客户端的浏览器上
- 功能:后端语言可以操作文件,可以读写数据库,前端语言不能操作文件,不能读写数据库。
Node.js如果安装成功,可以查看Node.js的版本,在终端输入如下命令:
2.安装npm
在安装node.js完成后,在node.js中会同时帮我们安装一个npm包管理器npm。我们可以借助npm命令来安装node.js的包。这个工具相当于python的pip管理器。
1
2
3
4
5
6
7
| npm install -g 包名
npm list
npm view 包名 engines
npm outdated
npm update 包名
npm uninstall 包名
npm 命令 -h
|
3.安装vue-cli
如果安装速度过慢,一直超时,可以考虑切换npm镜像源:http://npm.taobao.org/
1. vue-cli生成项目目录
使用vue自动化工具可以快速搭建单页应用项目目录。
该工具为现代化的前端开发工作流提供了开箱即用的构建配置。只需几分钟即可创建并启动一个带热重载、保存时静态检查以及可用于生产环境的构建配置的项目
1
2
3
4
5
6
7
8
9
10
11
| // 生成一个基于 webpack 模板的新项目
vue init webpack 项目目录名
例如:
vue init webpack myproject
注:Vue3.0使用 vue create 项目目录名
// 启动开发服务器 ctrl+c 停止服务
cd myproject
npm run dev
// 运行这个命令就可以启动node提供的测试http服务器
|
运行了上面代码以后,终端下会出现以下效果提示:
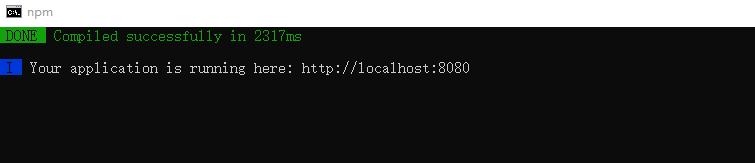
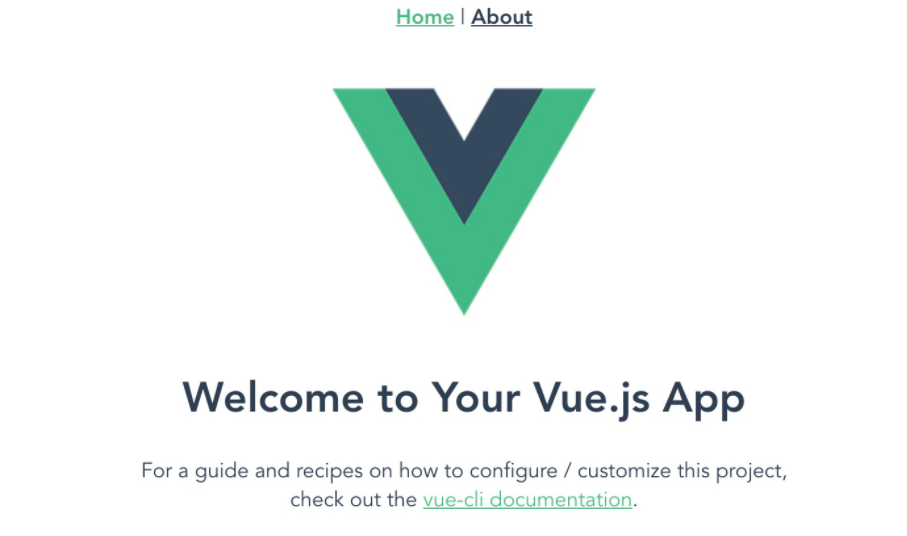
访问:http://localhost:8080/就可以看到欢迎页面
2. 项目目录结构
项目相关的代码,我们都放在 src 的文件夹中,该文件夹中的结构如下:
- build是项目打包时依赖的目录
- dist项目打包发布文件夹,最后要上线单文件项目文件都在这个文件夹中[后面打包项目,让项目中的vue组件经过编译变成js 代码以后,dist就出现了]
- config是配置目录
- node_modules目录是node的包目录,通过npm install安装的包都会被放到这个目录存储
- index.html # 站点访问入口,整个项目所有的页面内容最终都会被加载到这个页面中进行展示
- src 主开发目录,项目相关的代码都在此文件夹中
- assets 是资源文件夹,通常我们会把图片资源放在里面。
- components 文件夹通常会放一些组件。
- router 文件夹里面放的是 VueRouter 的相关配置。
- App.vue 定义了一个根组件。
- main.js 是项目的入口文件。
- package.json # 整个项目的包列表记录文件
- static 静态资源目录,所有的css,js文件放在这个文件夹
vue-cli 给我们提供了一个默认的项目文件结构,当然你并不是一定要按照这个文件结构来编写项目,你完全可以根据项目的需要或者个人喜好对项目结构加以改写。
3. 项目执行流程图
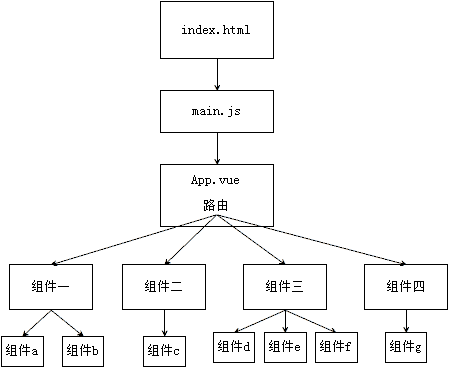
整个项目是一个主文件index.html,index.html中会引入src文件夹中的main.js,main.js中会导入顶级单文件组件App.vue,App.vue中会通过组件嵌套或者路由来引用components文件夹中的其他单文件组件。
4.父子组件传递数据
父组件的数据传递给子组件
可以通过props属性来进行数据传递.
传递数据三个步骤:
在父组件中,调用子组件的组件名,使用属性值的方式往下传递数据
1
2
3
4
5
| <Menu :mynum="num" title="home里面写的数据"/>
# 上面表示在父组件调用Menu子组件的时候传递了2个数据:
如果要传递变量[变量可以各种类型的数据],属性名左边必须加上冒号:,同时,属性名是自定义的,会在子组件中使用。
如果要传递普通字符串数据,则不需要加上冒号:
|
在子组件中接受上面父组件传递的数据,需要在vm组件对象中,使用props属性类接受。
1
2
3
4
5
6
7
8
9
10
11
12
13
| <script>
export default {
name:"Menu",
props:["mynum","title"],
data: function(){
return {
msg:"这是Menu组件里面的菜单",
}
}
}
</script>
// 上面 props属性中表示接受了两个数据。
|
在子组件中的template中使用父组件传递过来的数据.
1
2
3
4
5
6
| <template>
<div id="menu">
<span>{{msg}},{{title}}</span>
<div>hello,{{mynum}}</div>
</div>
</template>
|
使用父组件传递数据给子组件时, 注意一下几点:
传递数据是变量,则需要在属性左边添加冒号:
传递数据是变量,这种数据称之为”动态数据传递”
传递数据不是变量,这种数据称之为”静态数据传递”
父组件中修改了数据,在子组件中会被同步修改,但是,子组件中的数据修改了,是不是影响到父组件中的数据.
这种情况,在开发时,也被称为”单向数据流”
子组件传递数据给父组件
- 在子组件中,通过
this.$emit()来调用父组件中定义的事件.
1
2
3
4
5
6
7
8
9
10
11
12
13
14
15
16
17
18
19
20
21
22
23
24
25
26
| <template>
<div>
<p>Post的子组件</p>
<h2>{{fnum}}</h2>
<p>data={{data}}</p>
<p>fnum={{fnum}}</p>
<div><input type="text" v-model="fnum"></div>
</div>
</template>
<script>
export default {
name: "PostSon",
// 父组件传递数据给子组件: 1. 在父组件中调用子组件的组件名称标签上面声明属性和传递值,2. 在子组件中通过props进行接收
props:["data","fnum"], // 接受父组件中传递过来的数据
// 子组件传递数据给父组件[事件的方式进行传递]:
watch:{
fnum(){
console.log(this.fnum);
// this.$emit("父元素的自定义事件","要传递的数据"); // 通过this.$emit()方法,子组件可以把数据传递给父组件
this.$emit("postparentdata",this.fnum);
}
}
}
</script>
|
- 父组件中声明一个和子组件中
this.$emit("自定义事件名称")对应的事件属性。
1
2
3
4
5
6
7
| <template>
<div>
<h1>num={{num}}</h1>
<Son data="我是父组件里面的内容" :fnum="num" @postparentdata="getsondata"></Son>
</div>
</template>
|
- 父组件中,声明一个自定义方法,在事件被调用时,执行的。
1
2
3
4
5
6
7
8
9
10
11
12
13
14
15
16
17
18
19
20
21
| <script>
import Son from "./PostSon"
export default {
name: "Post",
data(){
return {
num: 100,
}
},
components:{
Son:Son,
},
methods:{
getsondata(message){
console.log("父组件"+message);
this.num = message;
}
}
}
</script>
|
5.在组件中使用axios获取数据
接着在main.js文件中,导入axios并把axios对象 挂载到vue属性中多为一个子对象,这样我们才能在组件中使用。
1
2
3
4
5
6
7
8
9
10
11
12
13
14
| import Vue from 'vue'
import App from './App'
import axios from 'axios';
Vue.config.productionTip = false
Vue.prototype.$axios = axios;
new Vue({
el: '#app',
components: { App },
template: '<App/>'
});
|
组件中使用
1
2
3
4
5
6
7
8
9
10
11
12
13
14
15
16
| <script>
export default{
...
methods:{
get_data:function(){
this.$axios.get('url').then(response => {
this.data = response.data;
}).catch(error => {
this.$message.error("网络异常!");
})
}
}
}
</script>
|
6.vue-router
6.1 初始化项目
清除默认的HelloWorld.vue组件和APP.vue中的默认模板代码和默认css样式
1
2
3
4
5
6
7
8
9
10
11
12
13
14
15
16
17
18
19
| <template>
<div id="app">
</div>
</template>
<script>
export default {
name: 'App',
components: {
}
}
</script>
<style>
</style>
|
初始化项目的时候没有选择vue-router时,需要下载安装路由组件
1
2
| npm install vue-router -S
|
6.2 配置路由
初始化路由对象
如果在vue创建项目的时候,设置安装vue-router,则项目会自动帮我们生成上面的router目录和index.js里面的代码,以及自动到main.js里面注册路由对象。
如果没有设置安装则需要在src目录下创建routes路由目录,在router目录下创建index.js路由文件
index.js路由文件中,编写初始化路由对象的代码 .
1
2
3
4
5
6
7
8
9
10
11
12
13
14
15
16
17
|
import Vue from "vue";
import Router from "vue-router";
Vue.use(Router);
export default new Router({
mode: "history",
routes:[
]
})
|
注册路由信息
打开main.js文件,把router路由规则对象注册到vue中,代码:
1
2
3
4
5
6
7
8
9
10
11
12
13
14
| import Vue from 'vue'
import App from './App'
import router from './router/index';
Vue.config.productionTip = false
new Vue({
el: '#app',
router,
components: { App },
template: '<App/>'
});
|
在视图中显示路由对应的内容
在App.vue组件中,添加显示路由对应的内容。代码:
1
2
3
4
5
6
7
8
9
10
11
12
13
14
15
16
17
18
19
20
| <template>
<div id="app">
<!-- 标签名必须是这个rouer-view -->
<router-view/>
</div>
</template>
<script>
export default {
name: 'App',
components: {
}
}
</script>
<style>
</style>
|
6.3 路由对象提供的操作
在我们安装注册了vue-router组件以后,vue-router在vue项目中会帮我们在全局范围内所有组件里面创建2个对象给我们使用:
this.$router,可用于在js代码中进行页面跳转。this.$route,可用于获取地址栏上面的url参数。
6.3.1 页面跳转
在vue-router提供的操作中, 进行页面跳转有2种方式:
使用<router-link to="url地址">来跳转
在<script>中使用this.$router.push(url地址)来跳转
在<script>中还可以使用this.$router.go(整数),表示跳转返回上一页或者上几页,下一个或者下几页
router-link标签
例如,我们就可以在Home.vue组件中,使用router-link跳转到User.vue组件中。
routes/index.js
1
2
3
4
5
6
7
8
9
10
11
12
13
14
15
16
17
18
19
20
21
22
23
24
25
26
27
28
29
30
31
32
33
34
35
|
import Vue from "vue";
import Router from "vue-router";
Vue.use(Router);
import Home from "../components/Home";
import User from "../components/User";
export default new Router({
mode:"history",
routes:[
{
name:"Home",
path: "/",
component: Home
},{
name:"User",
path: "/user",
component: User
},
],
});
|
Home.vue代码:
1
2
3
4
5
6
7
8
9
10
11
12
13
14
15
16
17
18
19
20
21
22
23
24
25
26
27
| <template>
<div>
首页页面组件
<a href="/user">个人中心</a>
<!-- router-link标签,本质上就是a标签,只是由vue-router进行加工处理
可以显示局部页面刷新,不会重新加载内容,进行ajax跳转
-->
<router-link to="/user">个人中心</router-link>
<router-link :to="url">个人中心</router-link>
<router-link :to="{name:'User'}">个人中心</router-link>
</div>
</template>
<script>
export default {
name: "Home",
data(){
return {
url: "/user",
}
},
methods:{
}
}
</script>
|
this.$router.push()跳转
1
2
3
4
5
6
7
8
9
10
11
12
13
14
15
16
17
18
19
20
21
22
23
24
25
26
27
28
29
30
31
32
33
34
35
| <template>
<div>
首页页面组件
<a href="/user">个人中心</a>
<!-- router-link标签,本质上就是a标签,只是由vue-router进行加工处理
可以显示局部页面刷新,不会重新加载内容,进行ajax跳转
-->
<router-link to="/user">个人中心</router-link>
<router-link :to="url">个人中心</router-link>
<router-link :to="{name:'User'}">个人中心</router-link>
<button @click="jump">个人中心</button>
</div>
</template>
<script>
export default {
name: "Home",
data(){
return {
url: "/user",
}
},
methods:{
jump(){
// 开发中可以先进行权限,登录之类的判断,然后再进行跳转
// this.$router.back(); // 返回上一页,本质上就是 location.back()
// this.$router.go(-1); // 返回上一页,本质上就是 location.go()
// this.$router.forward(); // 跳转到下一页,本质上就是 location.forward()
this.$router.push("/user"); // 跳转到站内的制定地址页面中,本质上就是 location.href
// 注意,this.$router.push() 不能跳转到其他网站。如果真的要跳转外站,则使用location.href="站外地址,记得加上http://协议"
}
}
}
</script>
|
6.3.2 参数传递
vue-router提供了this.$route,可以让我们接收来自其他页面的附带参数。参数有2种:
- 查询字符串(
query string),就是地址栏上面?号后面的参数,
- 路由参数(
router params),就是地址栏上面路由路径的一部分,
获取查询字符串
- 必须先有一个页面跳转发送参数。例如,在Home组件中跳转到User组件中,需要传递name和pwd查询字符串。
Home.vue代码:
1
2
3
4
5
6
7
8
9
10
11
12
13
14
15
16
17
18
19
20
21
| <template>
<div>
首页页面组件
<router-link :to="`/user?name=${name}&pwd=${pwd}`">查询字符串参数</router-link>
<router-link :to="'/user?name='+name+'&pwd='+pwd">查询字符串参数</router-link>
</div>
</template>
<script>
export default {
name: "Home",
data(){
return {
name: "xiaoming",
pwd: "123",
url: "/user",
}
},
}
</script>
|
- 可以下一个页面中,这里代表的就是User组件,接收来自Home组件的参数。
1
2
3
4
5
6
7
8
9
10
11
12
13
14
15
16
17
18
19
20
21
| <template>
<div>
用户中心页面组件
</div>
</template>
<script>
export default {
name: "User",
created() {
// 接收地址栏上面的参数
// this.$route是vue-router提供的一个用于接收地址参数的对象。
// 查询字符串参数
// query是this.$route里面的一个数组,this.$route会自动收集地址栏上所有的参数保存到query里面
// let name = this.$route.query.name;
// let pwd = this.$route.query.pwd;
// console.log(`name=${name}&pwd=${pwd}`); // ``里面,${}圈住的内容会被js当成变量来解析
}
}
</script>
|
获取路由参数
例如:我们用户的界面都是一样的,但是每一个用户来到自己的页面中,显示的内容肯定都是不一样的,此时,我们需要使用不同的路径来区分不同的用户。这时候,可以在路由路径中使用路由参数表示不同用户的id
需要设置一个route/index.js中路由信息里面,哪一段路由属于路由参数。
src/routes/index.js设置路由参数。
1
2
3
4
5
6
7
8
9
10
11
12
13
14
15
16
17
18
19
20
21
22
23
| import Vue from "vue";
import Router from "vue-router";
Vue.use(Router);
import Home from "../components/Home";
import User from "../components/User";
export default new Router({
mode:"history",
routes:[
{
name:"Home",
path: "/",
component: Home
},{
name:"User",
path: "/user/:id/img-:img_id",
component: User
},
],
});
|
然后我们就是在Home中如果需要转到User里面。
Home.vue代码:
1
2
3
4
5
6
7
8
9
10
11
12
13
14
15
16
17
18
19
20
| <template>
<div>
首页页面组件
<router-link to="/user/100/img-11111">路由参数</router-link>
</div>
</template>
<script>
export default {
name: "Home",
data(){
return {
name: "xiaoming",
pwd: "123",
url: "/user",
}
},
}
</script>
|
User.vue,组件中可以通过this.$route.params接收路由参数。
1
2
3
4
5
6
7
8
9
10
11
12
13
14
15
16
17
18
19
20
| <template>
<div>
用户中心页面组件
</div>
</template>
<script>
export default {
name: "User",
created() {
// 路由参数
// params是this.$route里面的一个数组,this.$route会自动收集路由列表中已经标记为路由参数所有内容保存到params中
let id = this.$route.params.id;
console.log(id);
let img_id = this.$route.params.img_id;
console.log(`img_id = ${img_id}`);
}
}
</script>
|
Vue 第三方库的使用
ElementUI
对于前端页面布局,我们可以使用一些开源的UI框架来配合开发,常用的UI框: bootstap,lay-UI框架,Amaze UI,zui框架,ElementUI.
Vue开发前端项目中,比较常用的就是ElementUI了。
ElementUI是饿了么团队开发的一个UI组件框架,这个框架提前帮我们提供了很多已经写好的通用模块,我们可以在Vue项目中引入来使用。
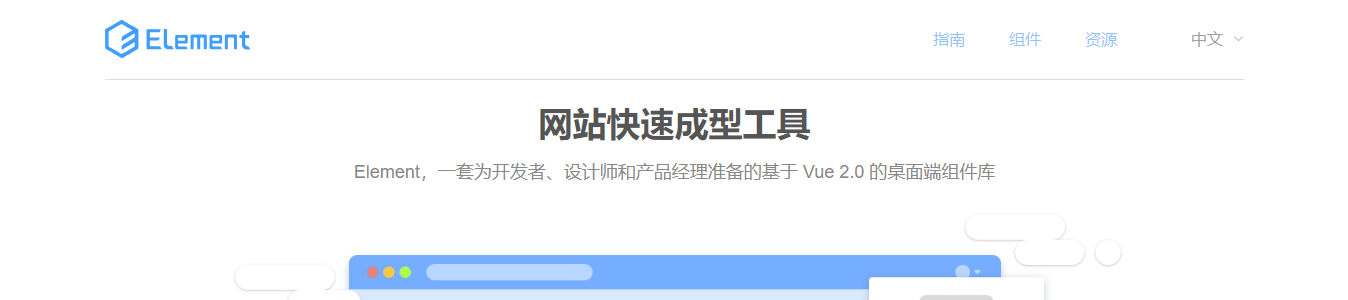
中文官网:http://element-cn.eleme.io/#/zh-CN
文档快速入门:http://element-cn.eleme.io/#/zh-CN/component/quickstart
快速安装ElementUI
1
2
| npm install element-ui -S
|
配置ElementUI到项目中
在main.js中导入ElementUI,并调用。代码:
此时,我们已经可以在项目中使用 Element 给我们提供的各种组件了。
我们可以修改views/Home.vue中的内容:
1
2
3
4
5
6
7
8
9
10
11
12
13
14
15
16
17
18
19
20
21
22
| <template>
<div class="home">
<h1>使用 icon 组件</h1>
<i class="el-icon-edit"></i>
<i class="el-icon-share"></i>
<i class="el-icon-delete"></i>
<h1>使用 button 组件</h1>
<el-button>默认按钮</el-button>
<el-button type="primary">主要按钮</el-button>
<el-button type="success">成功按钮</el-button>
<el-button type="info">信息按钮</el-button>
<el-button type="warning">警告按钮</el-button>
<el-button type="danger">危险按钮</el-button>
</div>
</template>
<script>
export default {
name: "Home",
components: {}
};
</script>
|